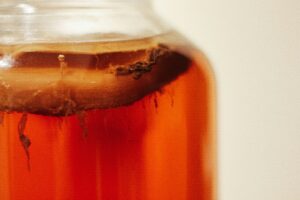
Once your kombucha tastes just right, it’s time to bottle it. Haven’t made it yet? Order your kit and then read this blog on making your first batch.
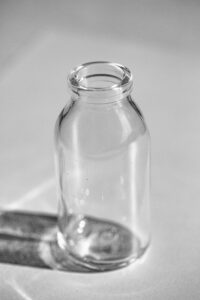
Photo by Hyeongju Seo on Unsplash
How to bottle
What you’ll need for bottling
- Sterilised bottles (about 3.2L total capacity)
- Sterilised funnel
- Sterilised measuring jug
- Sieve
- Clean bowl
- Optional: flavourings like fruit, ginger, herbs
Where to get bottles:
Rather than buying new, you can recycle glass bottles you’d usually consume. For me personally, I have cleaned and sterilised many of these Ekoplaza glass juice bottles and use them on repeat.
But if you would like to use plastic, then I’d recommend buying store bought still or sparkling water: Solan de Cabras 1.5l, S. Pellegrino (1l) or Spa Reine (1.5l) from Albert Heijn would be perfect. You need about 3.2 litres of capacity.
Preparing (and sterilising) your equipment:
- Funnel and jug: Boil in a pan of water for 10 minutes.
- Glass bottles:
- Place clean glass bottles into a cold oven.
- Set the oven to 180°C and let it heat up with the bottles inside.
- Once the oven reaches 180°C, keep the bottles in for 10 minutes.
- Turn off the oven, open the door slightly, and let the bottles cool before handling
- Alternatively, you can sterilise bottles by boiling in a pan for 10 minutes if you prefer not to use the oven.
Bottling your kombucha
- If you want to experiment with flavours (like ginger, lemon, berries), add them into the bottles now. I like to use puree or juices as it means I have no lumps when drinking.
- Gently take the SCOBY out of the jar and place it onto the clean bowl and set aside.
- Pour the kombucha from the jar, through the sieve (to take out the yeast clumps), into the sterilised measuring jug, then use the funnel to fill the bottles. Do not fill to the top and instead leave at least 2-3 cm (around 1 inch) of space at the top of each bottle.
- When there is about 400ml of kombucha in the bottom of the jar, stop bottling. This remaining liquid will become your starter liquid for your next batch. If you left the brew a long time, and this liquid is very vinegary then you can use less (250ml).
- After you finish bottling this batch’s kombucha, pour the saved starter liquid into the sterilised measuring jug and set aside. Then, gently move the SCOBY from the plate into the measuring jug, so it floats in the starter liquid. Cover the jug loosely with a clean cloth until you are ready to go again
You now have two choices for this brew:
Option 1: Refrigerate and drink immediately
- Put the bottles into the fridge to stop fermentation.
- This is ready-to-drink kombucha – light, refreshing, with perhaps a very slight fizz
Option 2: Second fermentation to intensify flavours and add natural carbonation for a bubblier drink.
- Leave the sealed bottles at room temperature (in a warm, dark spot away from sunlight- same spot as your kombucha) for 2-5 more days.
- Burp the bottles once a day, at the same time every day, by opening the caps slightly to release built-up pressure, then resealing. This is a very important step, don’t forget. If you forget to release pressure, then the bottles can over-carbonate and risk cracking – so do set yourself a reminder!
- After 2-5 days, refrigerate the bottles to stop the fermentation.

How to make first batch of Kombucha
Did you get a Kombucha Starter Kits? Then you’re ready to start brewing! Follow these step-by-step instructions to make your…
Why Kombooch was started
When I first decided to try brewing kombucha at home, I thought it would be simple. Tea, sugar, a SCOBY……Tips & tricks for a healthy brew
The good news? With the Kombooch kit, it’s genuinely hard to go wrong. The starter liquid you received is very…